The Vornado Transom fan is a blower fan designed to mount across the bottom of a hung window. I like the fan hardware. It includes an IR remote, runs at 4 discrete speeds, can be reversed electronically, physically closes when off, and includes a thermostatic function. I do not like the UI. It spends several seconds doing a light show every time you turn it on — which you have to wait for before you can change any settings — and it requires multiple state-dependent button pushes on both the remote and local interfaces. It’s very difficult to use reliably if you cannot see the display panel when changing settings
Luckily it’s possible to read and set most of the device state without any significant modification. There are separate motor control and UI boards and the connection between them uses a UART link. Be sure to mitigate the 5V signal when connecting the UART. Probably this should have a level converter, if you were building a board, but mine worked with just a 47 kΩ current-limiting resistor inline
The IR receiver is easily accessible from the back of the UI board; the sensor output is the pin closest to the motor control board. If you set open-drain mode on your IR transmit pin the stock remote will continue to work
With those two connections it’s possible to simulate IR input (and/or read IR ambient signals from the sensor) and to determine the fan state, which allows for closed-loop automation
The device includes a thermostatic mode. That mode can be detected from the UART data when armed but not when triggered, nor can the set point or current temperature be determined. There is an NTC thermistor is connected with long wire and would be simple to move to a smarter controller if you wanted to use the fan’s existing sensor for a custom control
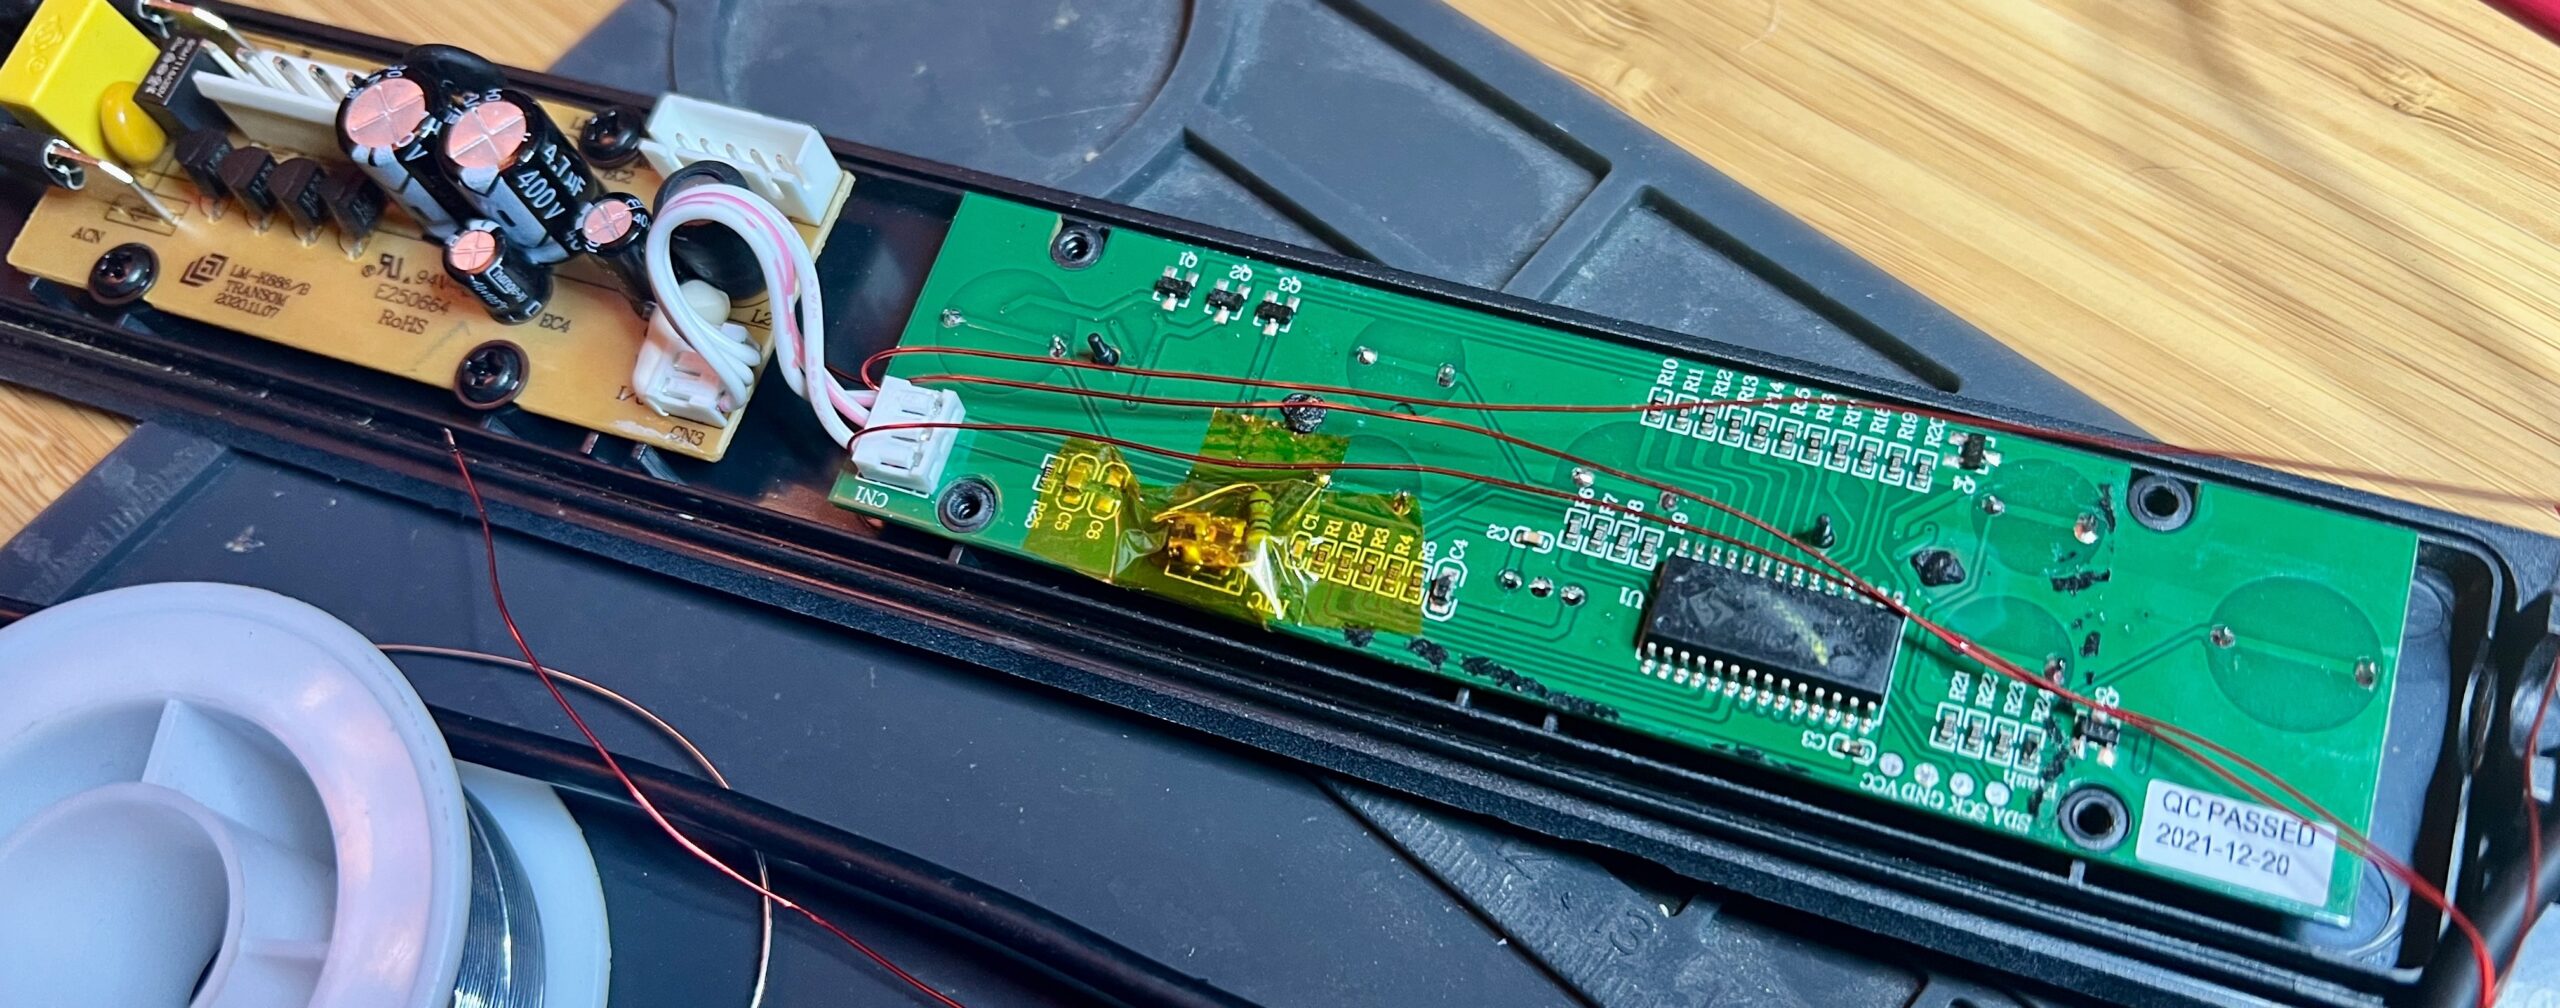
The fan provides 5V power from the motor control board to the UI board, but there’s less than 100 mA available and it needs to drive the whole UI board in addition to any load you add. The 100 mA limit comes from the MX2003, a slightly unusual chip that combines an array of darlington transistors (for driving the fan’s baffle motor) with a tiny 5V power supply driven from the higher voltage side of that array
The motor control board generates a higher current 12V supply for the baffle motor and I found plenty for room to stick in my own buck converter to provide more 5V current for the ESP32. There’s a big 47 Ω resistor next to the MX2003 that you can tap for access to the 12V rail
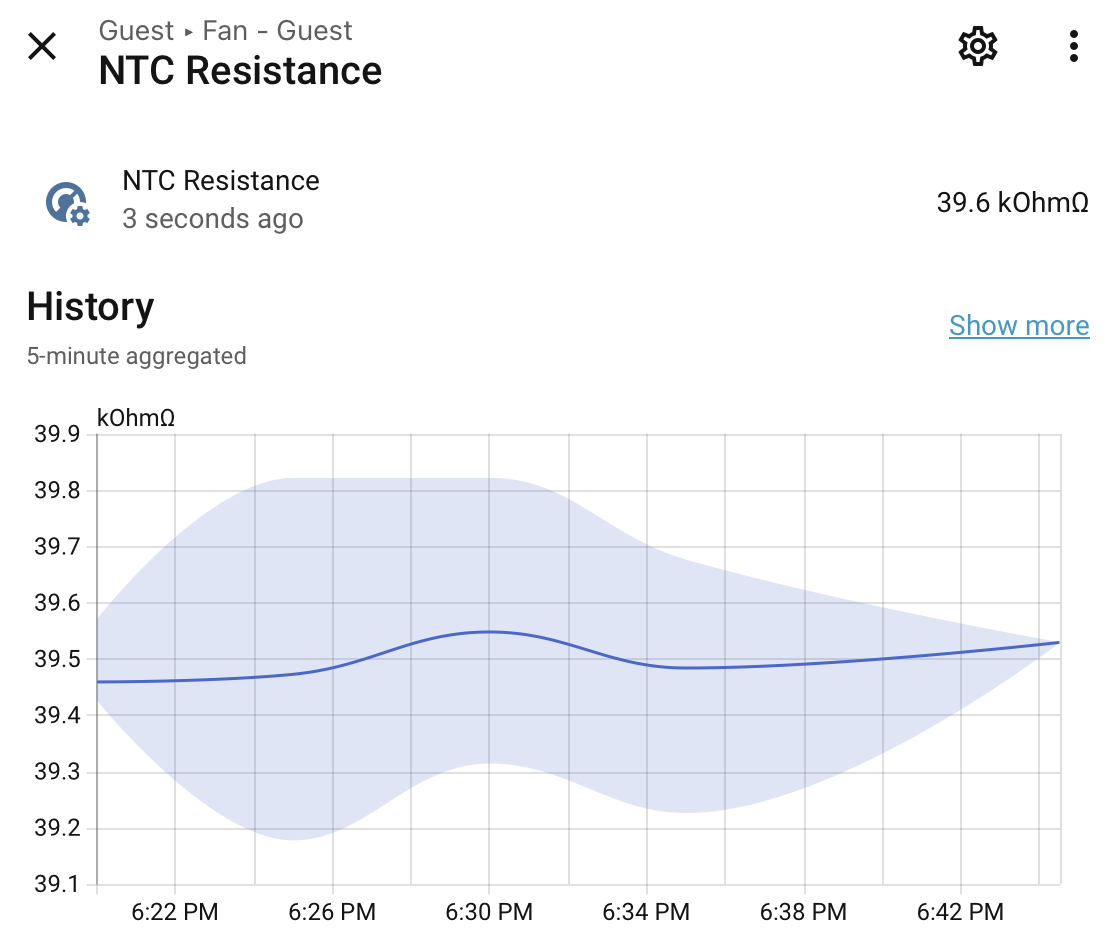
I revisited this project for a 3rd fan. In this unit attached the fan’s NTC thermistor to my ESP321, and bypassed it on the UI board. This gives me a temperature probe for the airspace inside the fan and the option to implement my own thermostat function, at the cost of the on-board thermostat functions
The stock thermostat toggle actually works better with the NTC bypassed. Preventing the stock thermostat from triggering (by locking the sensed temperature low; I used a 470 kΩ bypass which reads as 16 °F on the stock UI) resolves an ambiguity in the device state presented in UART messages
Example: fan-office.yaml
Library: zi3-fan-transom.yaml
- I got an updated Waveshare ESP32-S3-Zero for this unit, labeled N8R8, which comes with 8MB PSRAM on an octal link. Other revisions use quad 4MB PSRAM; their website confusingly says both versions have an octal link, but only the 8MB version actually does ↩︎