Dryers have long-standardized designs. They have slightly different motors and brains but the mechanics are all very similar and have been for a long time. Almost any dryer with a top-cover lint trap will come apart almost exactly like this one. Dryers with a lint trap inside the door are slightly different but also standardized, and other than the air path are almost identical to the unit pictured here
As with any repair start by ensuring the device is disconnected from power. Then open the lint trap door and remove the screws from inside it. Be sure not to drop them down the lint trap, as you’ll have to do a lot of apart-taking to get them back
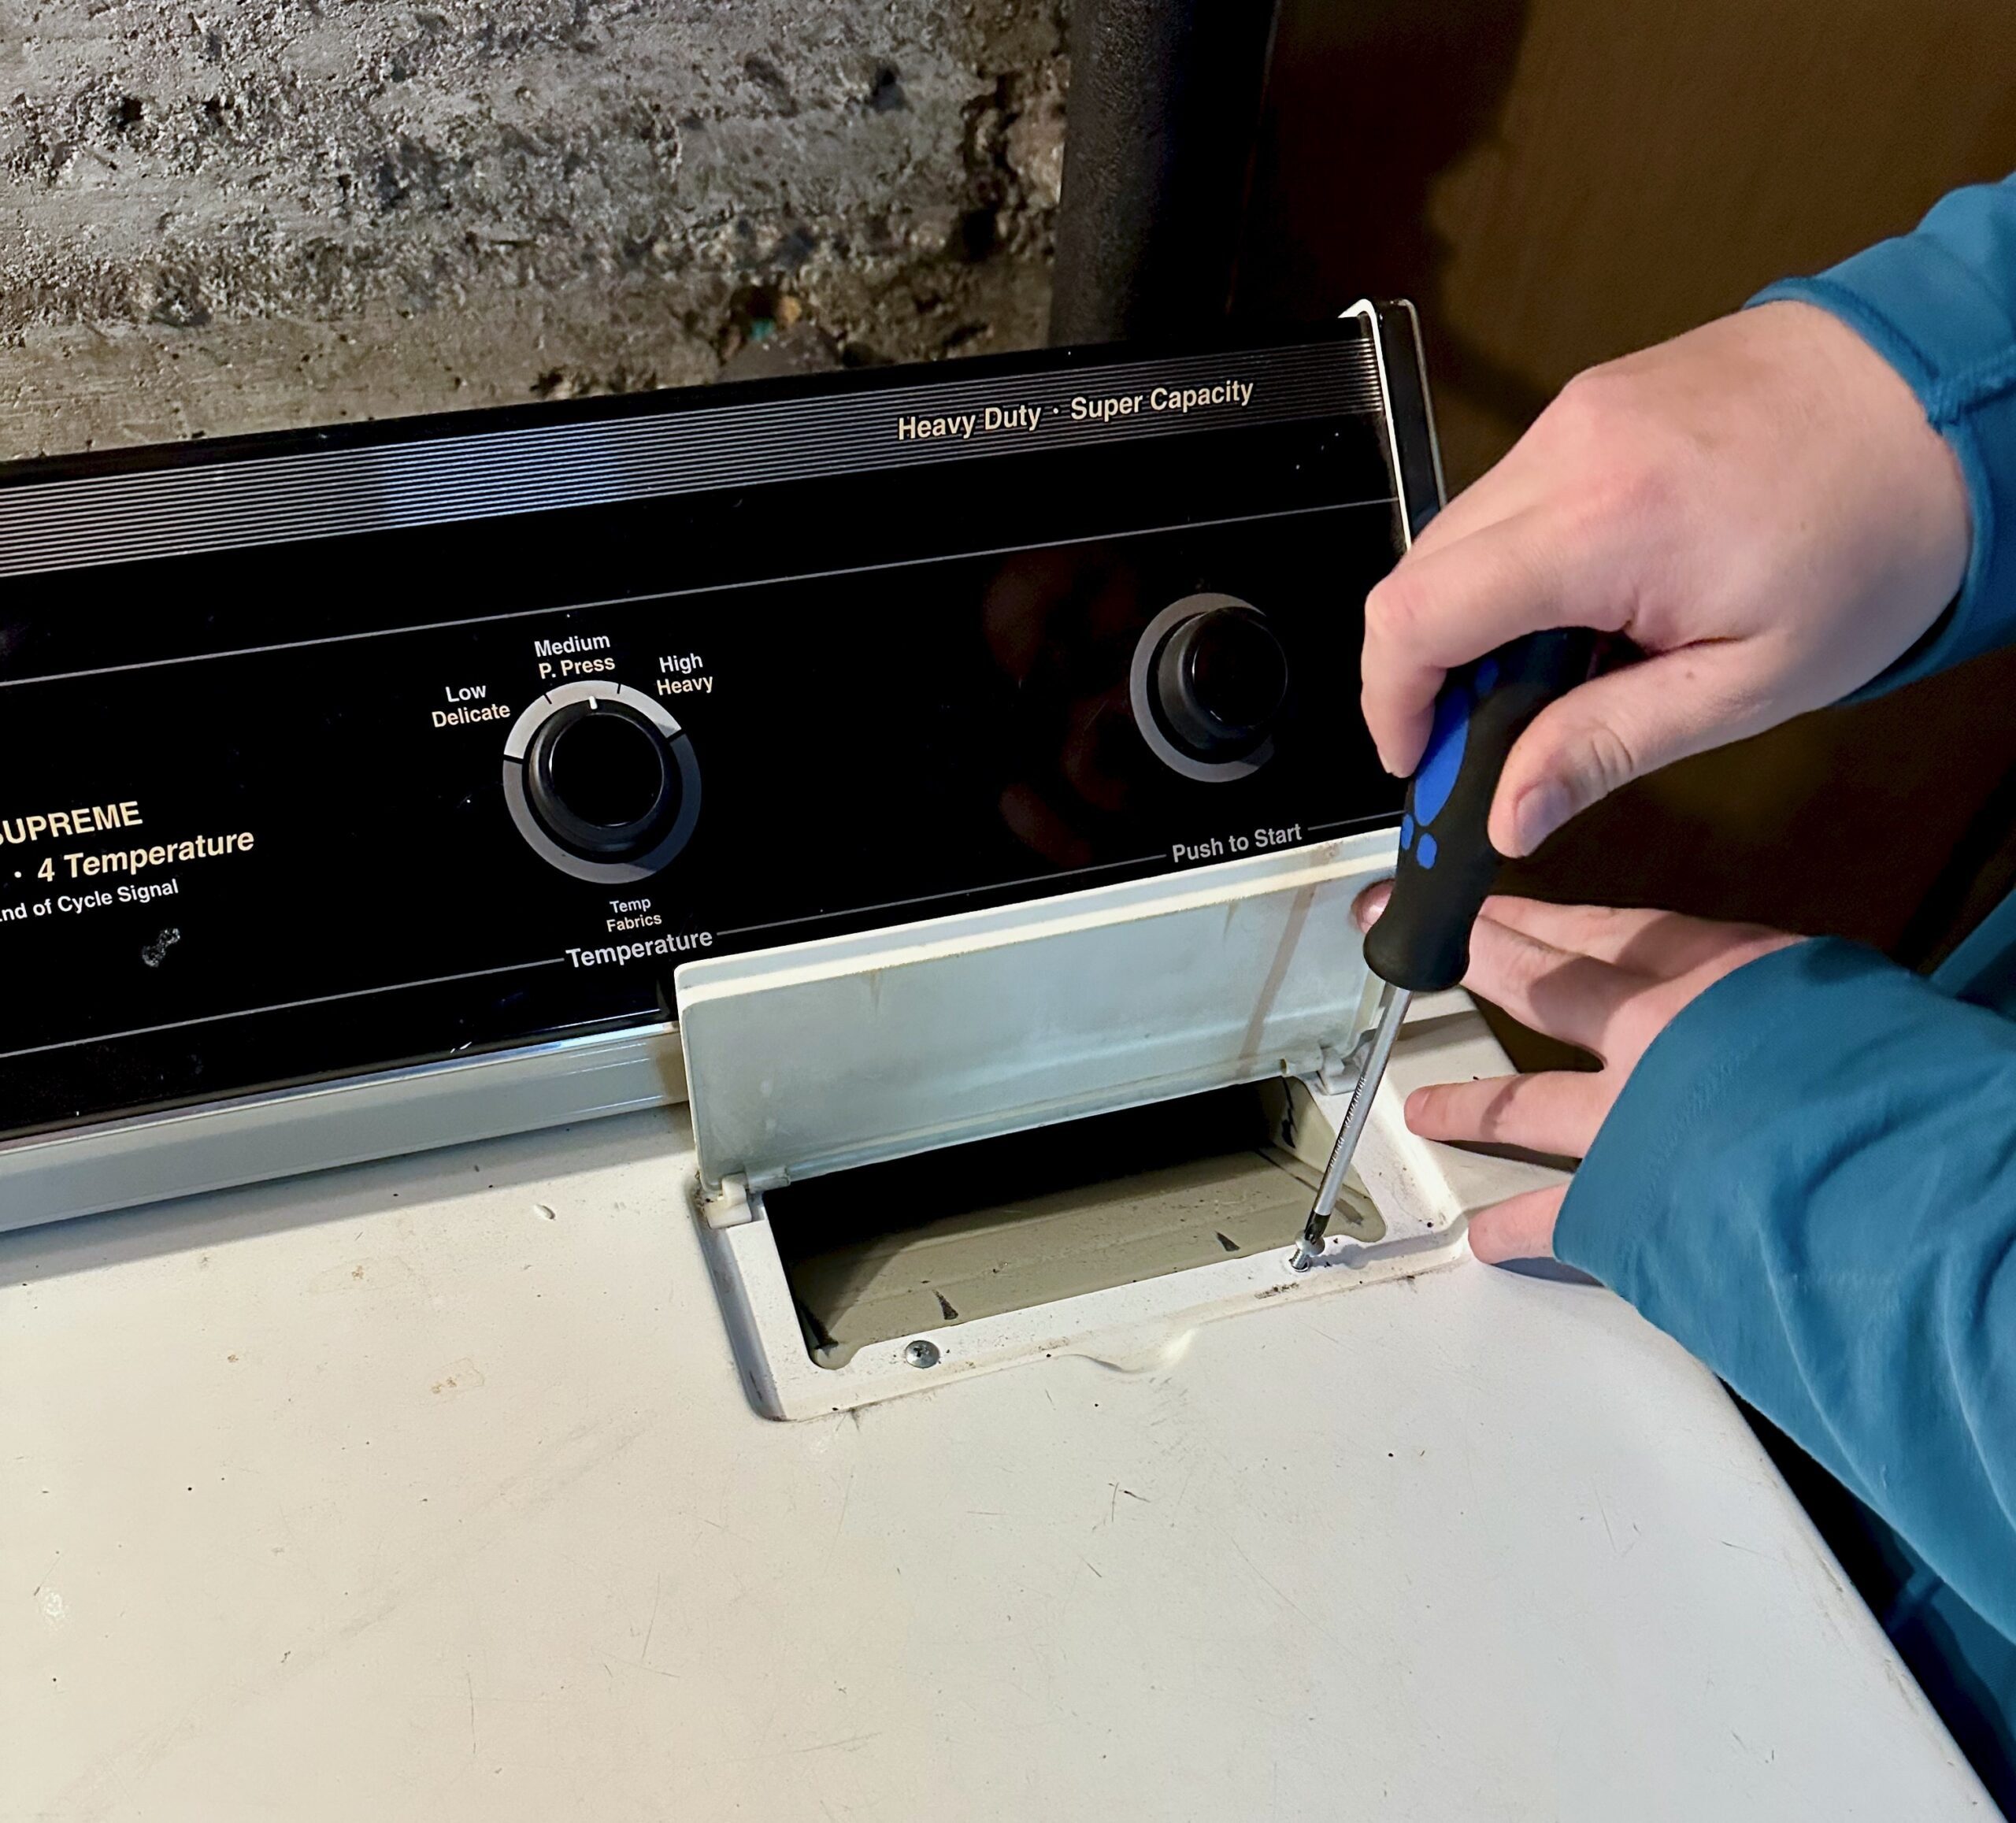
Those are the only external screws you need to take off; everything else is inside the machine. Near each of the front corners there’s a plastic clip that holds the top cover to the front panel. It works sort of like the release on your car hood, where you have to lift a little and then press a tab to release the rest of the way. Slide a screwdriver in the slot to find the clip; there’s enough slack to get a tool in without breaking things
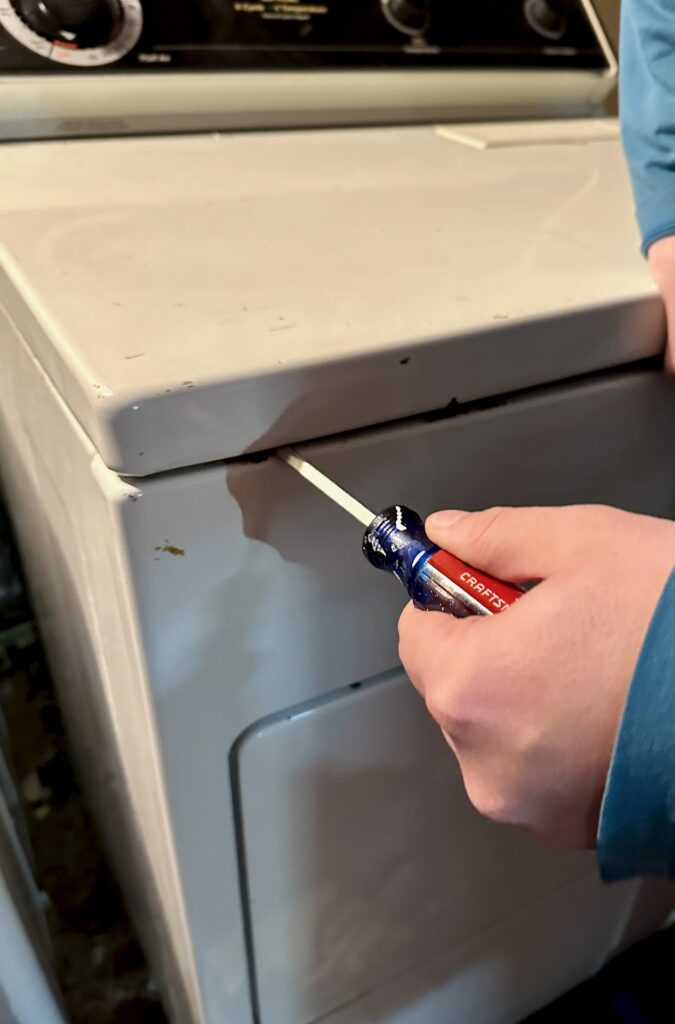
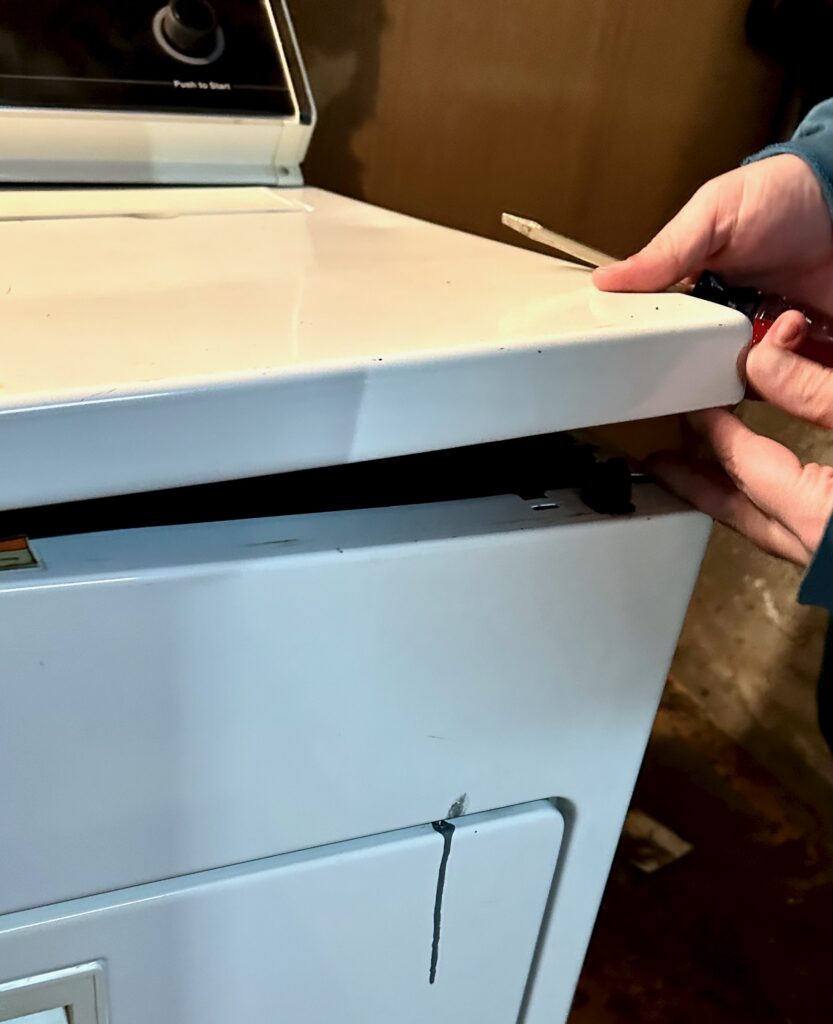
Once you find the clip push carefully from the front of the clip toward the back of the machine to depress the clip’s tab and simultaneously lift the corner of the lid. Pressing the clip’s tab will require a strong tool and medium pressure. Lifting the lid will require almost no pressure once the clip is free; don’t pull up too hard until the tab is depressed. You’ll have to do each side one at a time, but the parts will be loose enough to make that easy. When both sides are free the entire lid will swing up toward the back of the machine
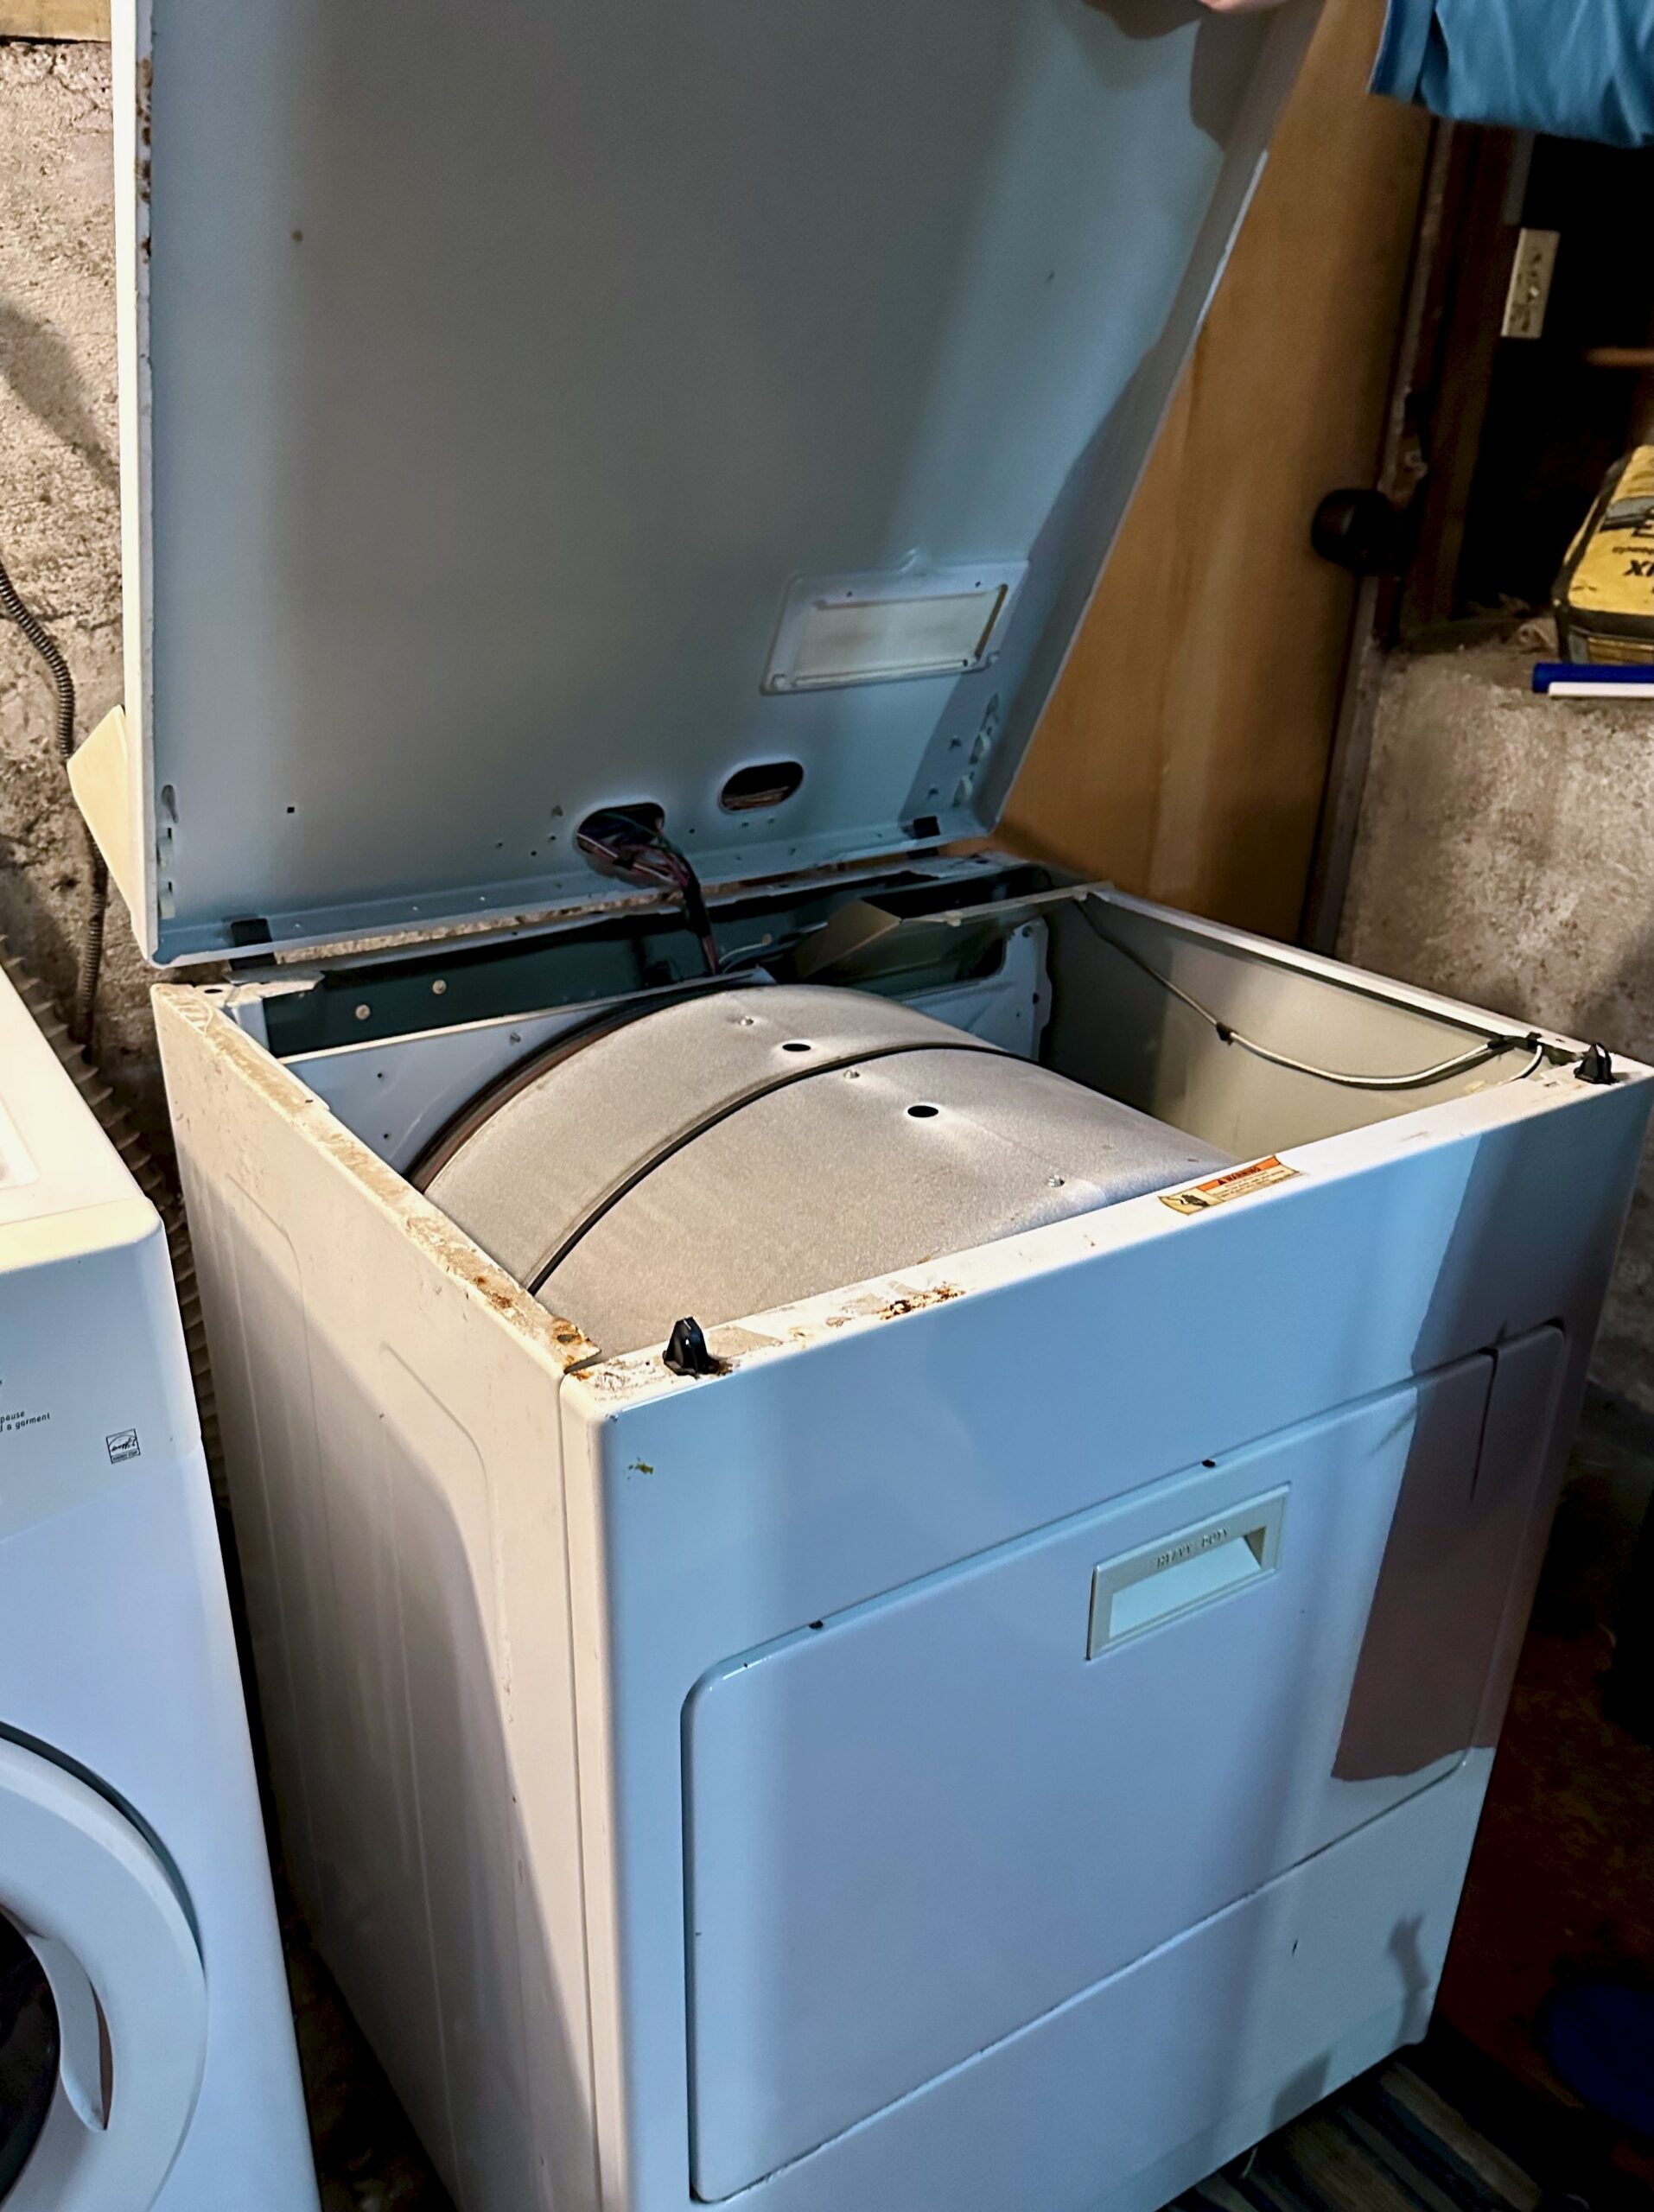
The next big part to come off is the front panel, but it will have a safety switch for the door that needs to be disconnected first. Find that switch and remove the wires from it. Sometimes both wires are in a single connector but often they’re separate. If they are separate they can go back on in either direction (but usually you can tell from the wire shape where they came from)
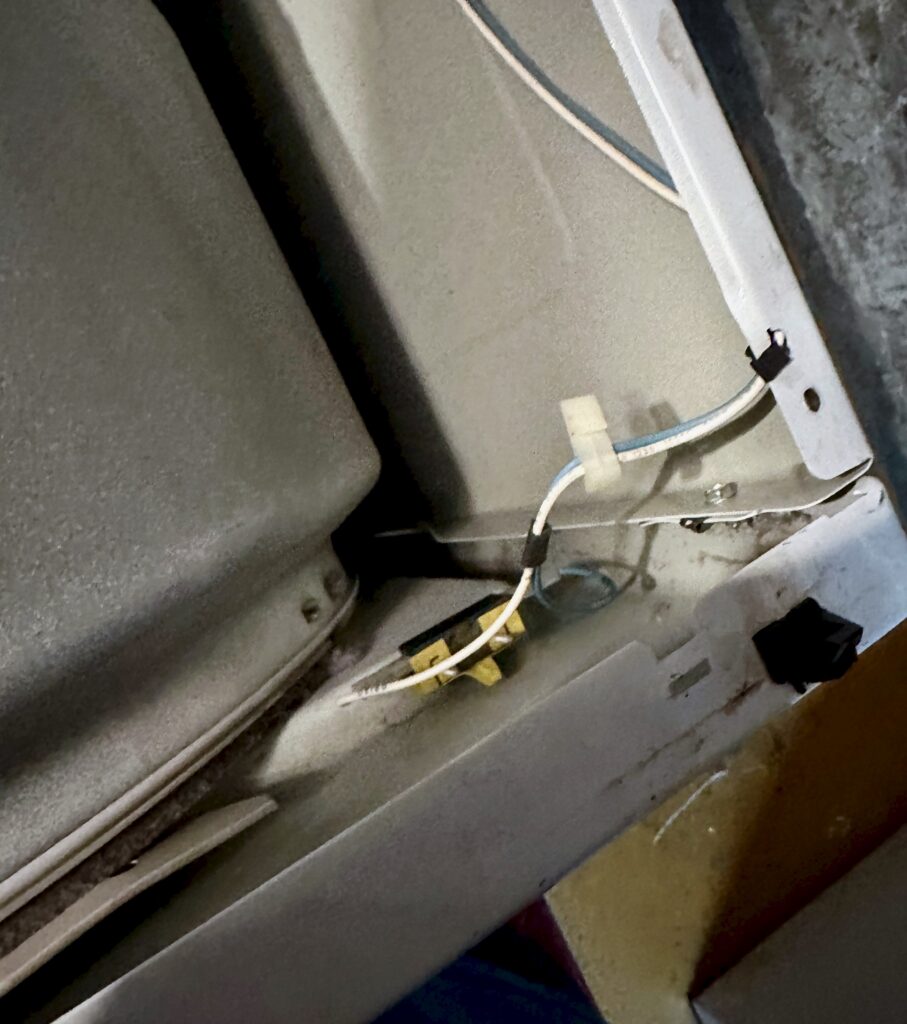
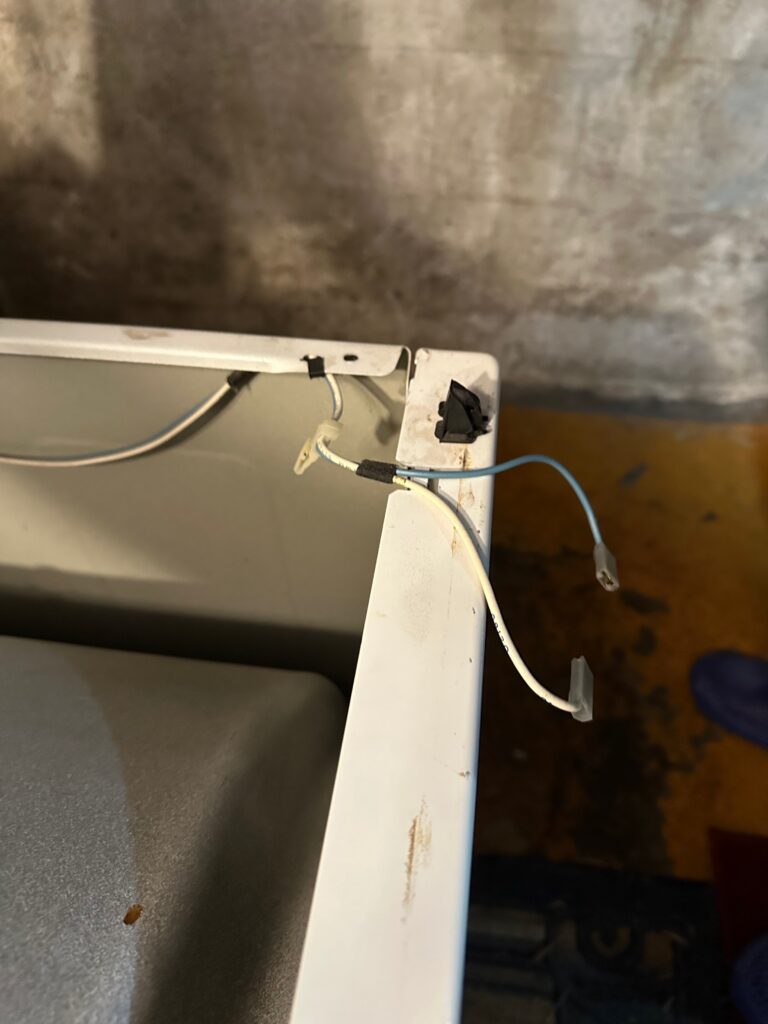
Now that the door switch is free the front panel can come off. It’s held on by clips or screws or bolts near the top corners. On mine it’s a single hex-head screw on each side. You’ll see this same sort of construction in many metal and plastic panels, where a screw goes through one panel and is attached another using a thin bolt clip. Sometimes it’s helpful to have a ratchet or right-angle screwdriver to get these screws out, as clearances against the panels can be tight
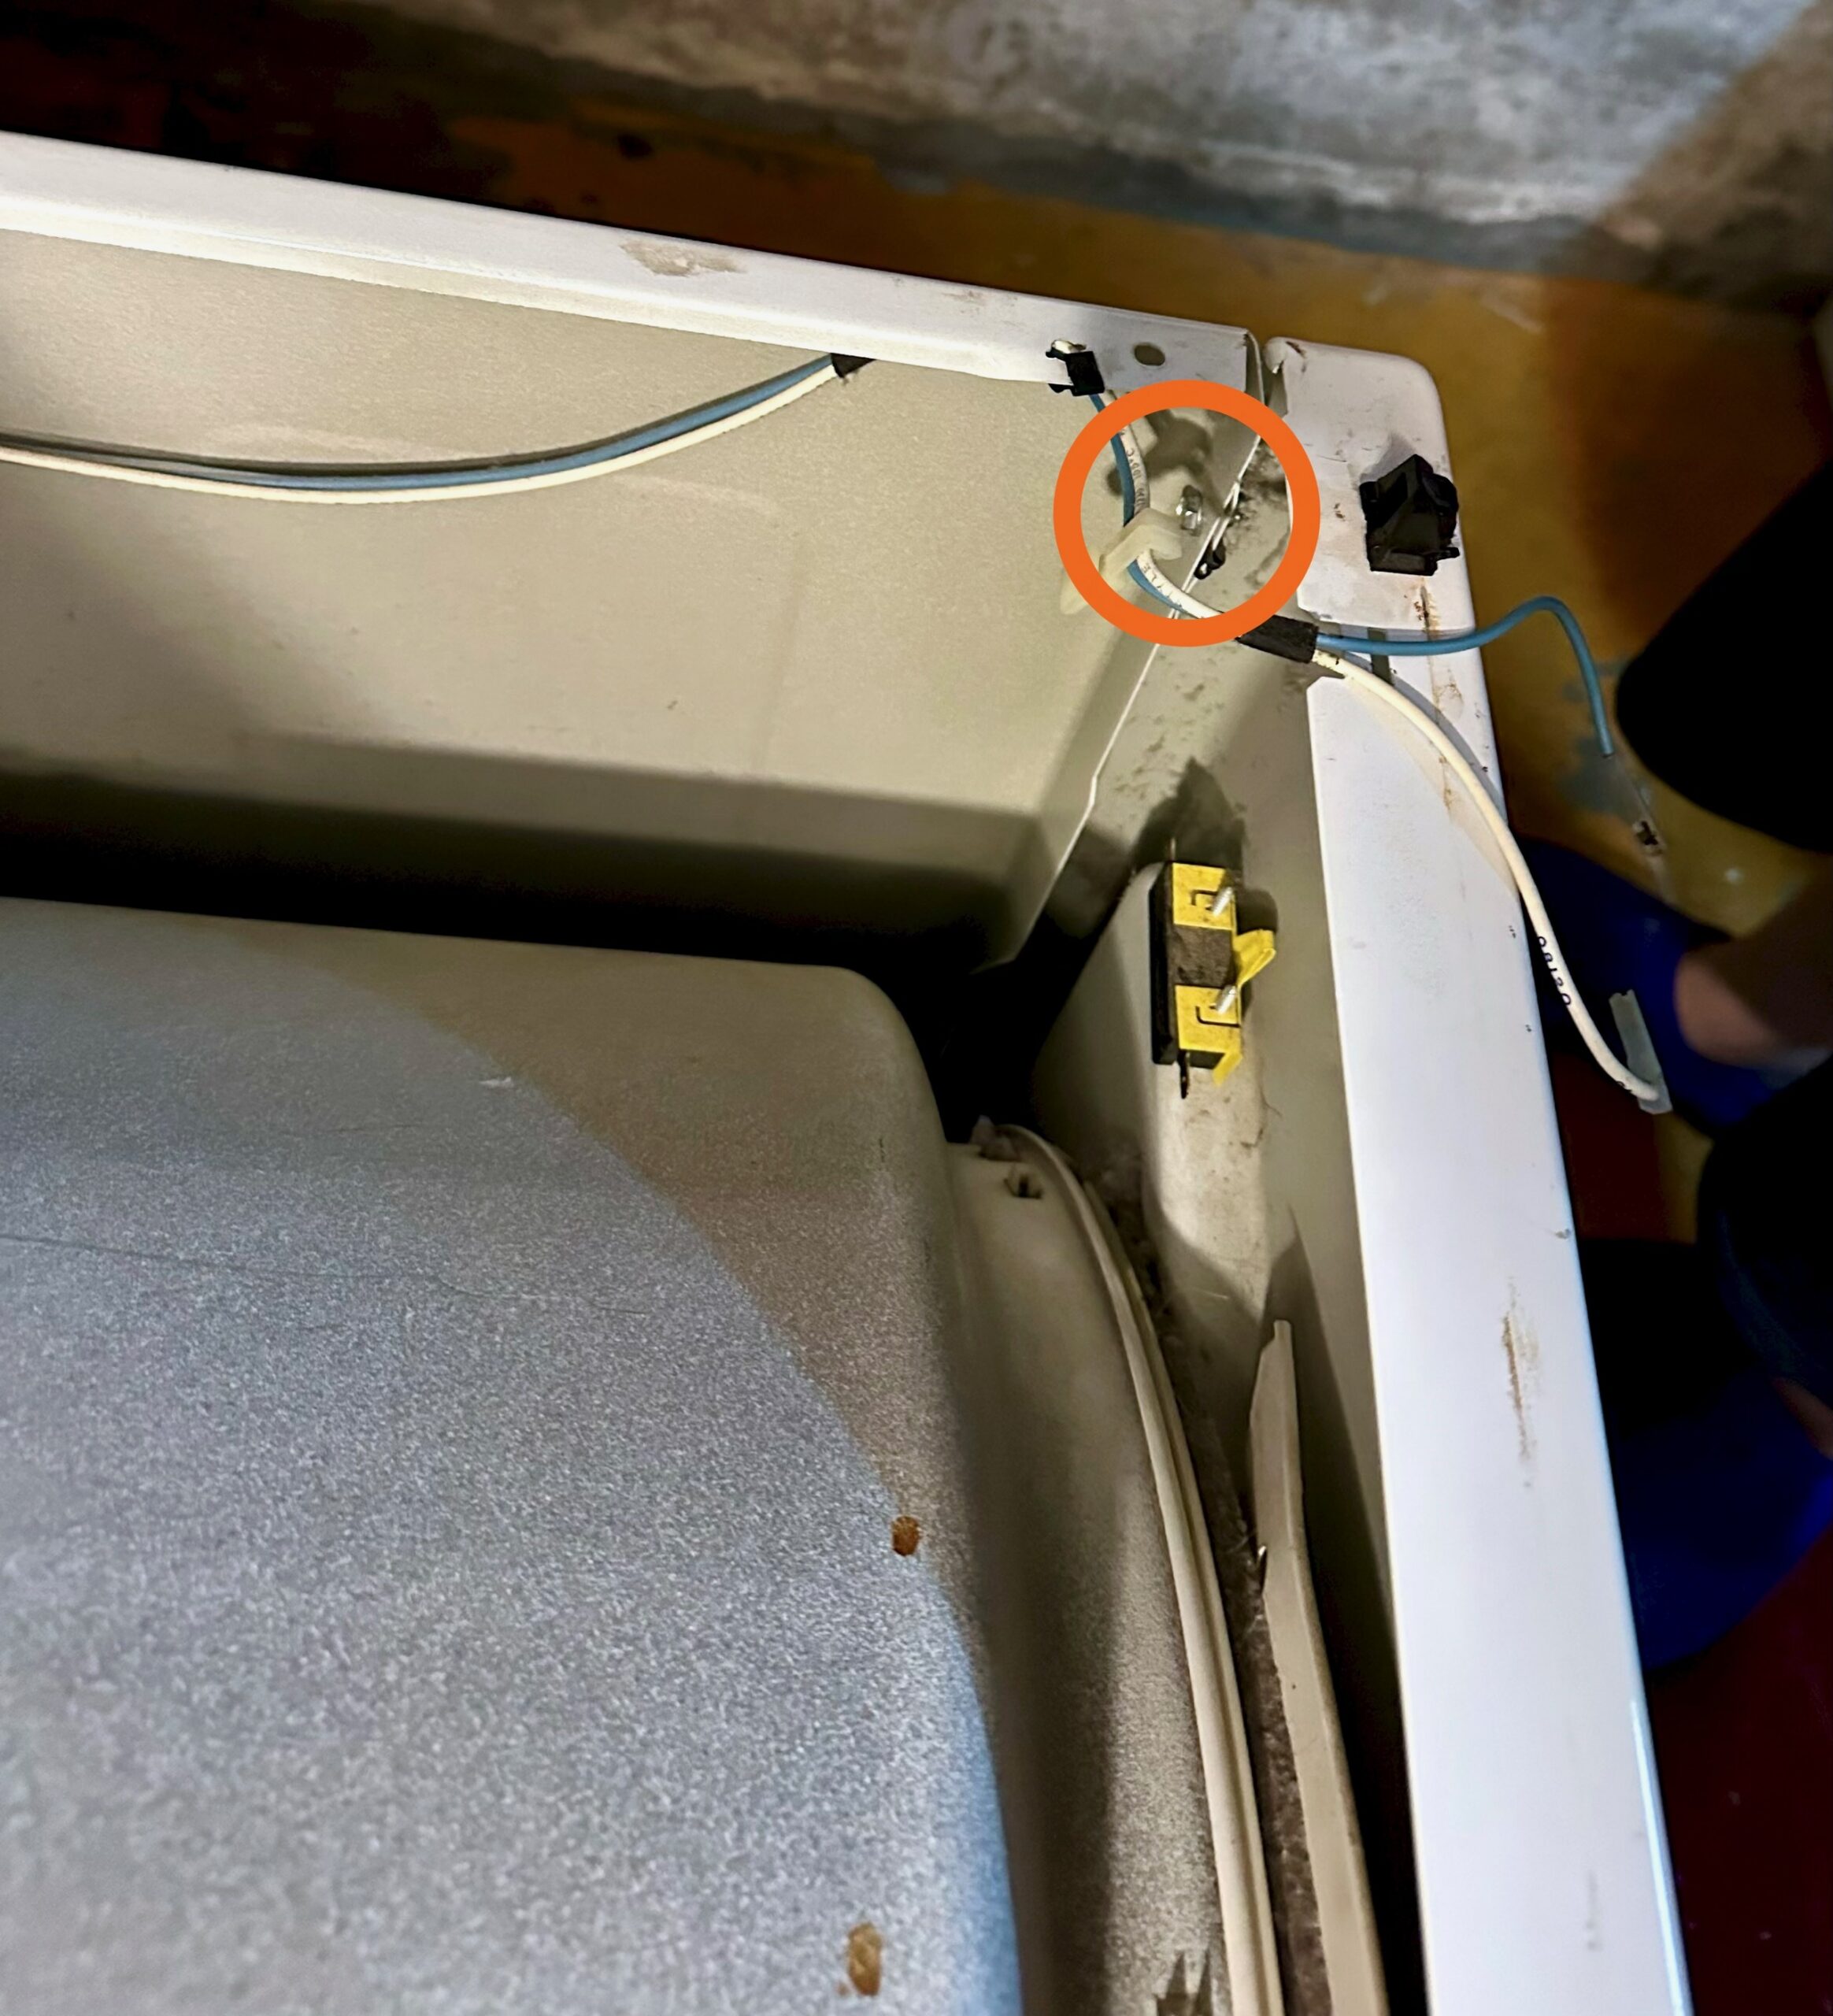
Once both sides are unscrewed the front panel will tip down and away from the machine. Once it’s tipped forward you can lift the whole front panel up to clear the tabs near the bottom, then the panel can be set aside
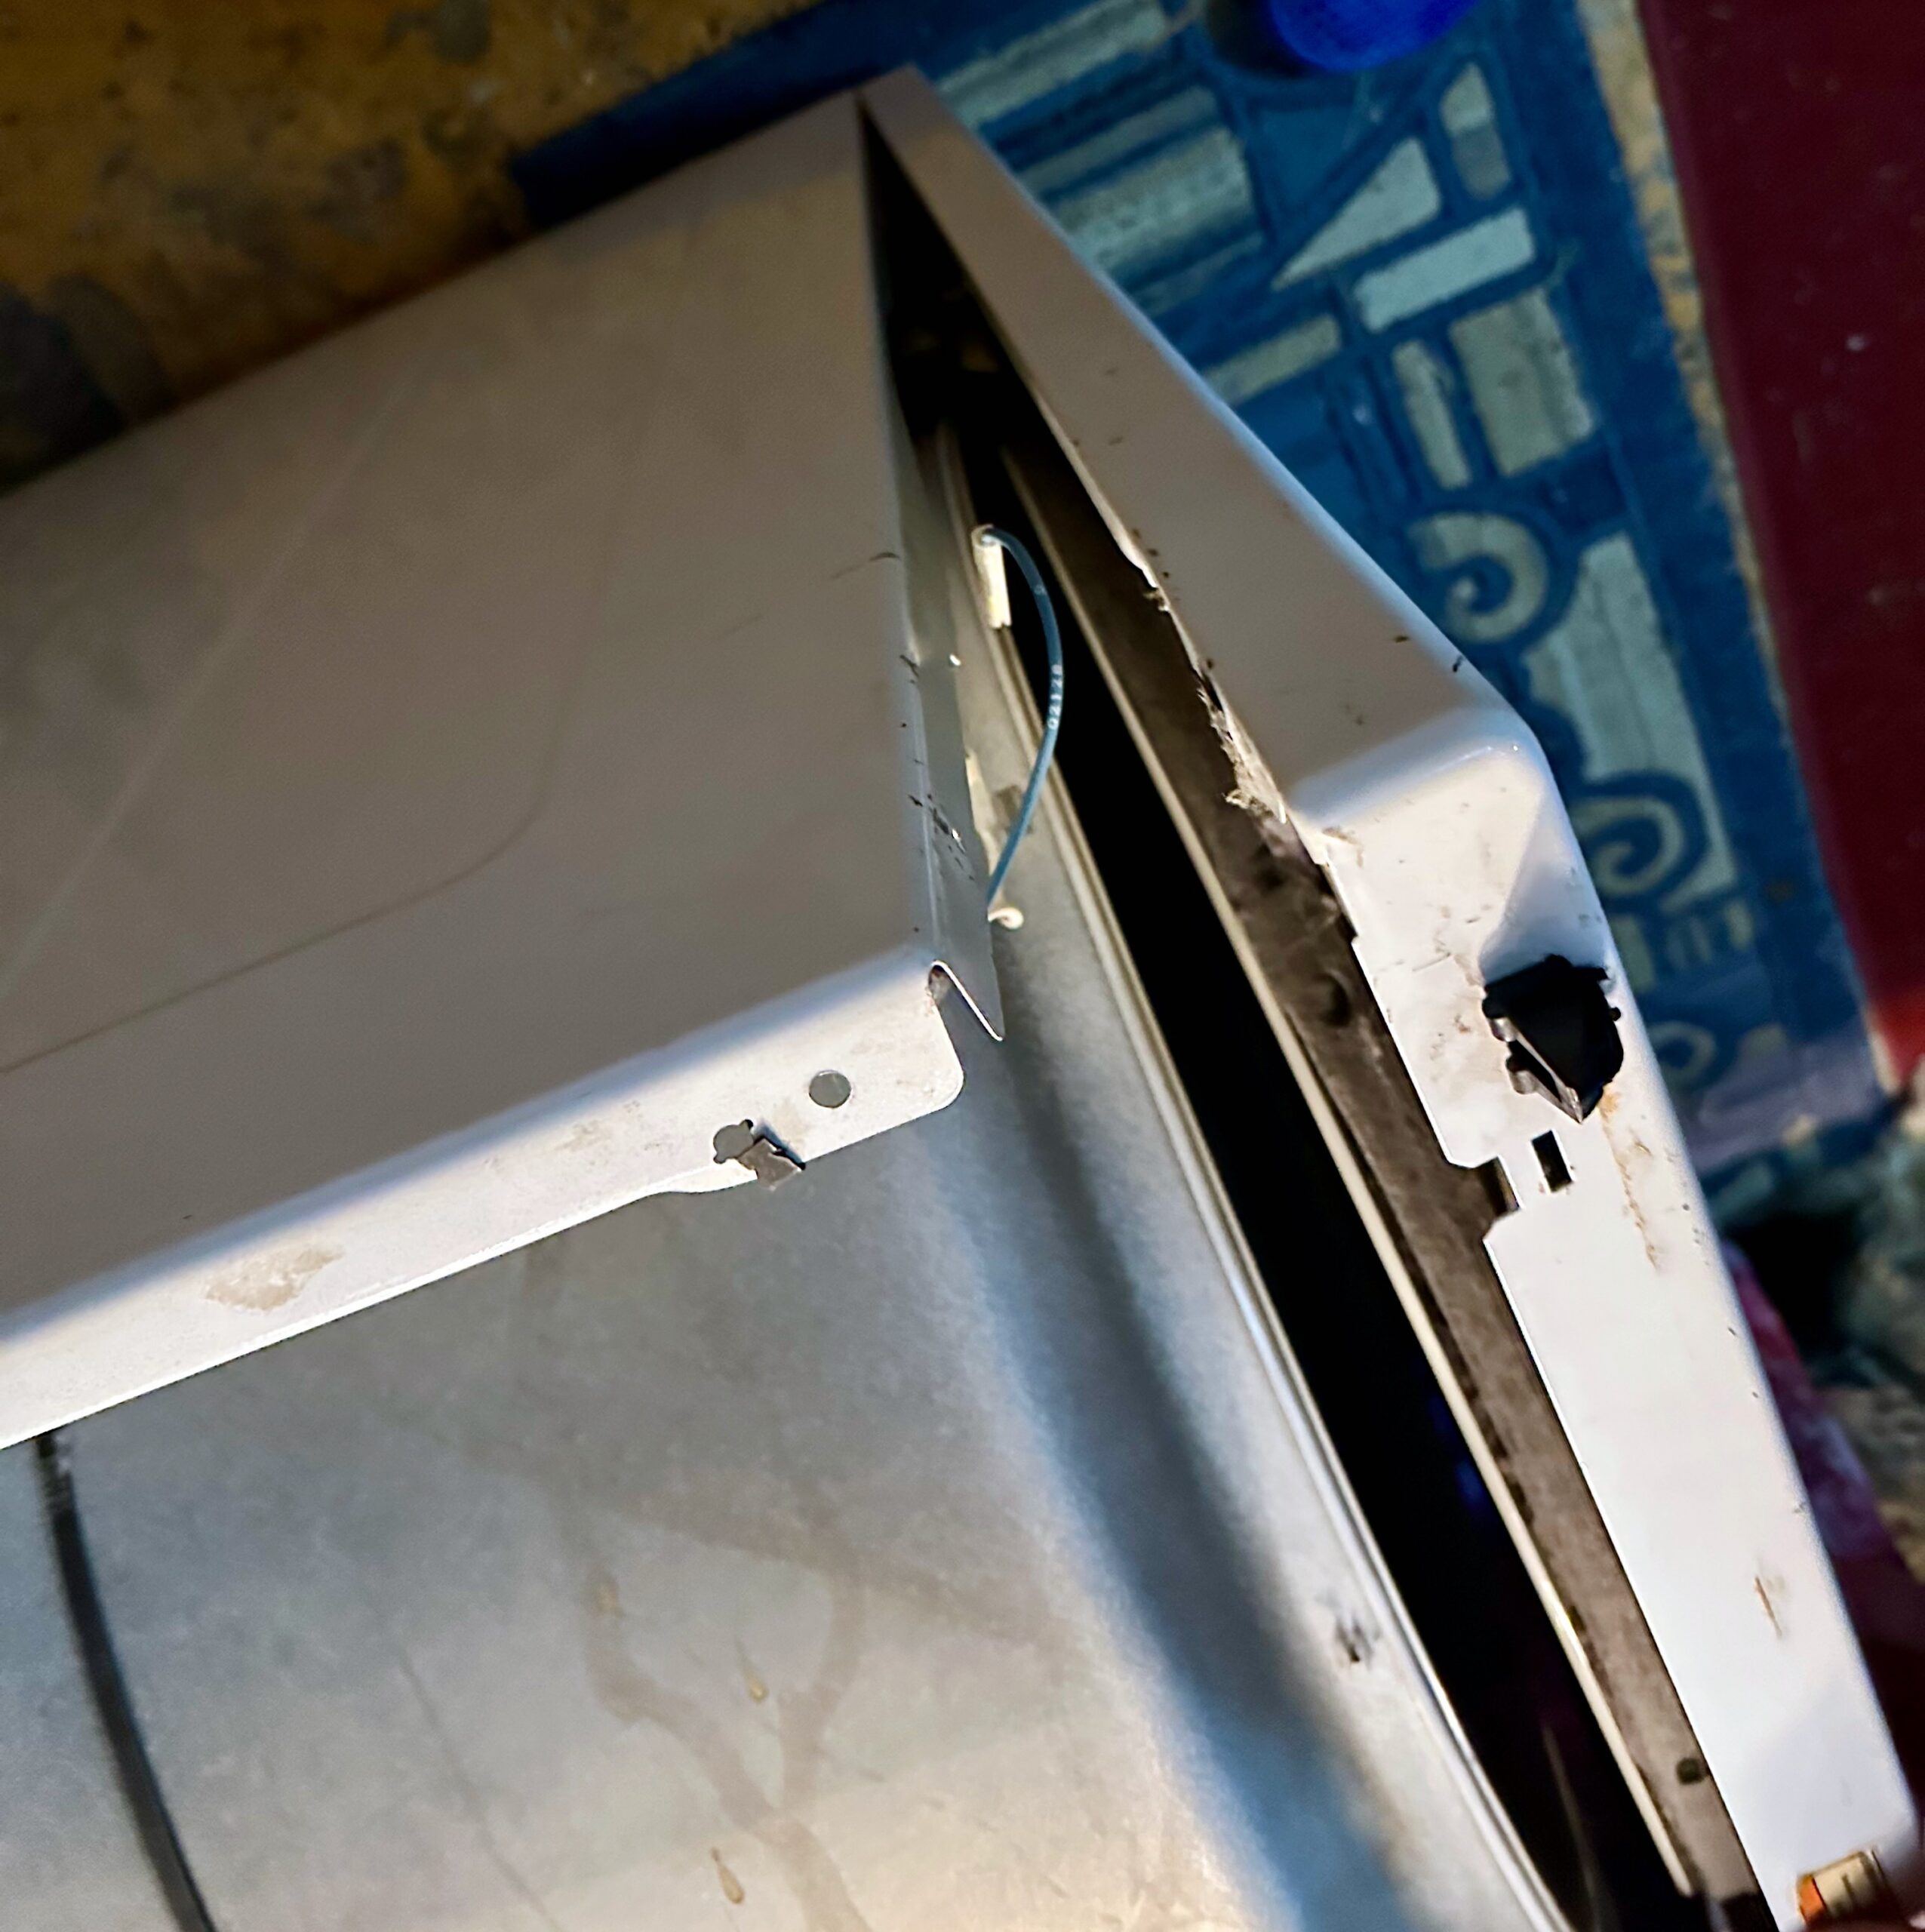
But the drum will fall as soon as you move the front panel, because it’s only held up by a small felt ring at the front and back. It’s not heavy but be prepared to hold it up. Having a helper can make this step much easier. Just press the back of the drum down and toward the back of the machine to stabilize it. Once the front is fully off you can move your hand to the front of the drum to support it
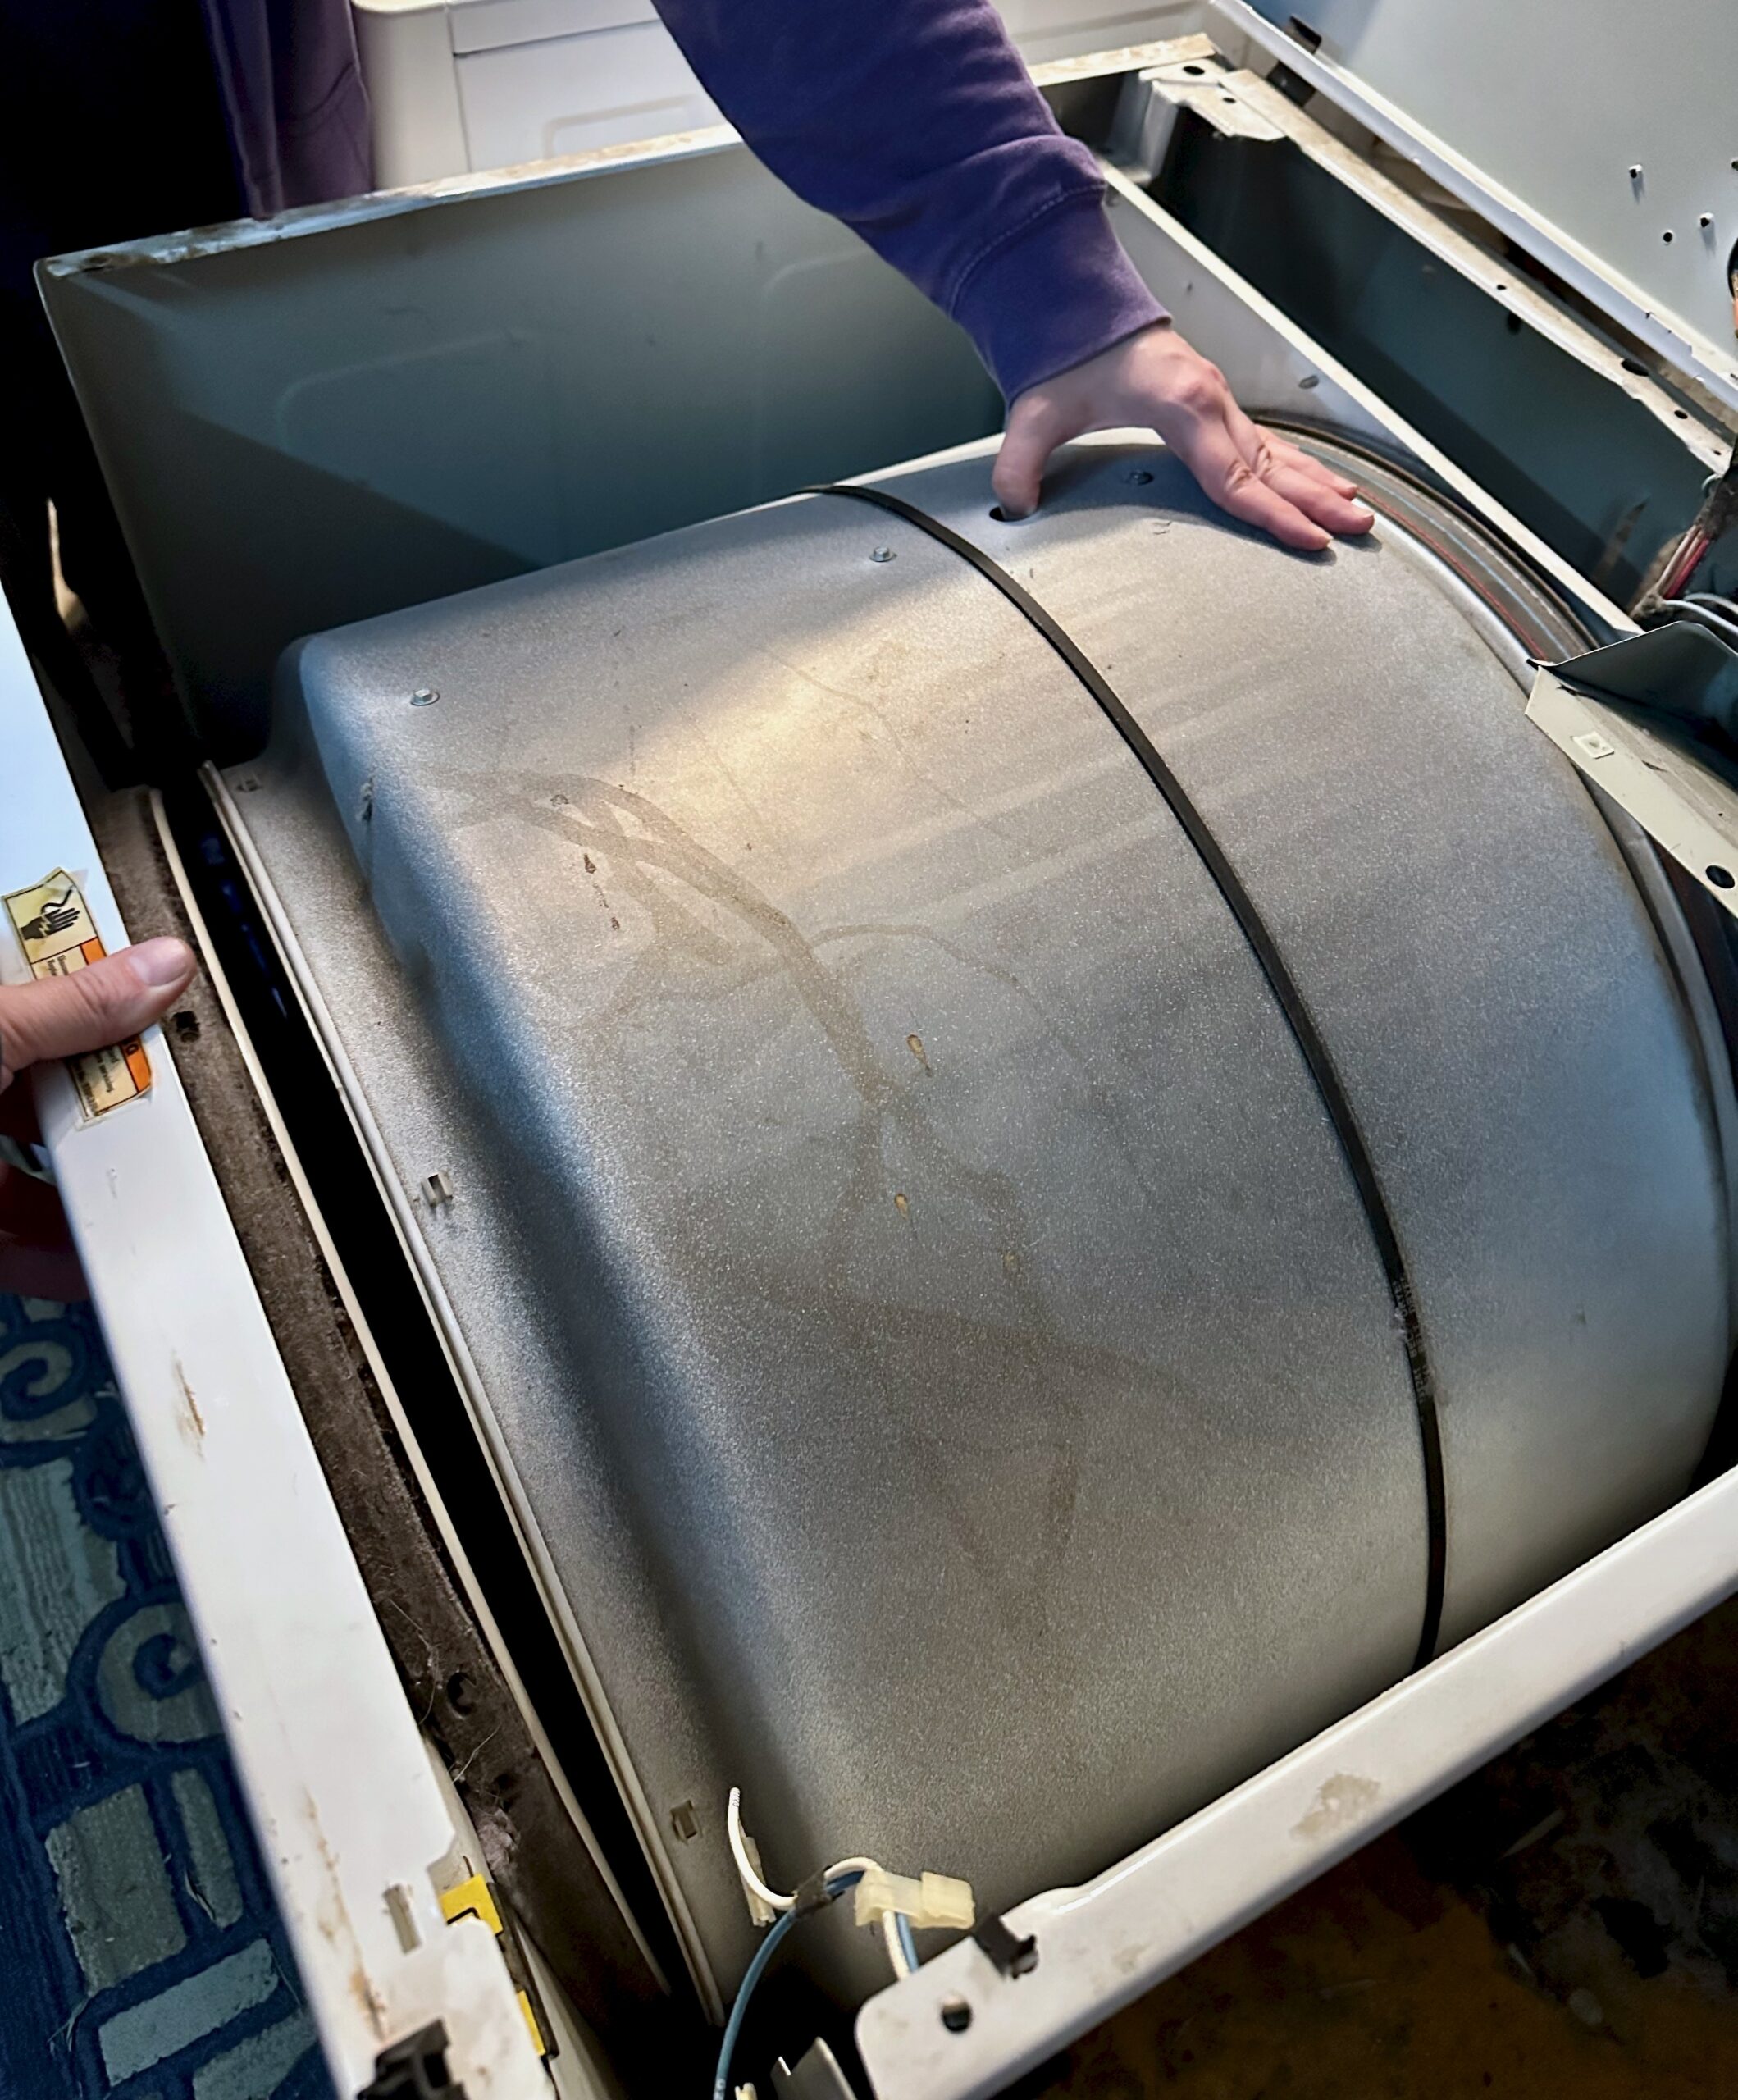
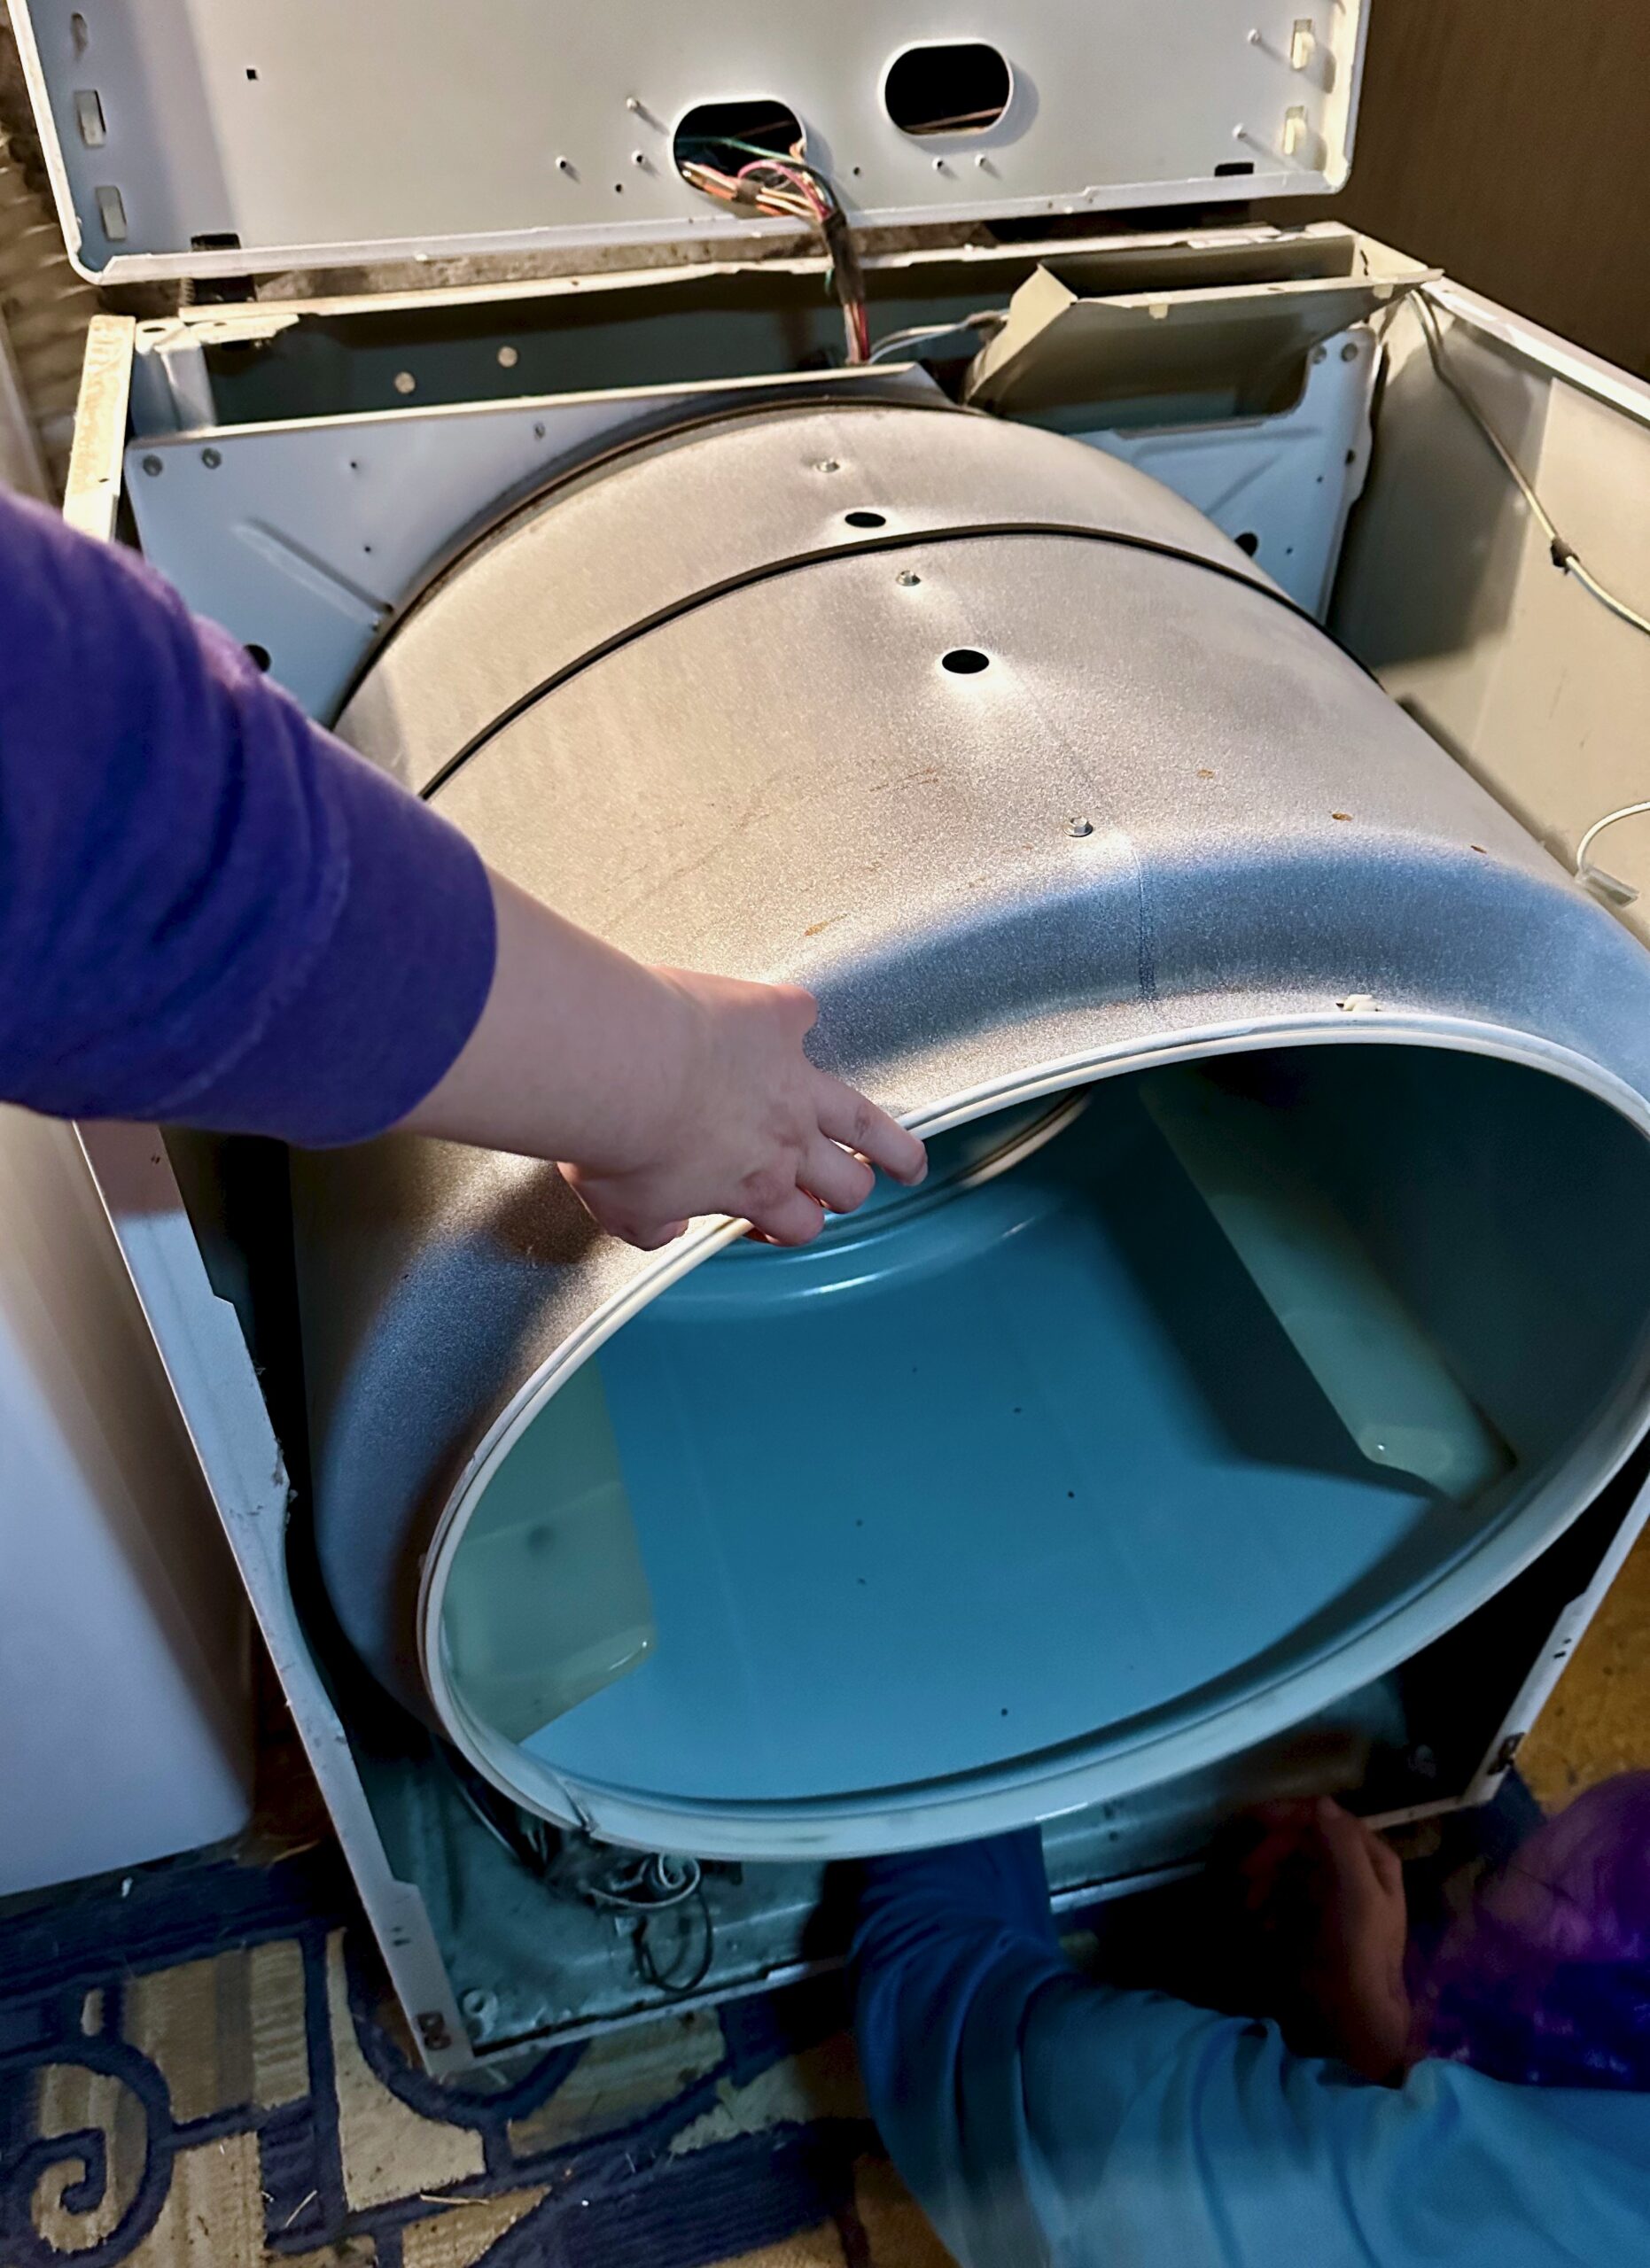
Notice the black belt around the drum. That belt loops connects to the dryer’s single motor. On mine the belt is intact around the drum but has slipped off the motor; my old dryer is slightly bent and sometimes spins itself apart. A common failure is for this belt to be broken, in which case it’s often sitting on inside the machine under the drum. You’ll know if that is happening because the fan and heat will run but the drum won’t spin
Note that you can take the drum entirely out. It is not connect by anything other than the belt, so if you slip the belt off the motor pulley (or if it’s already disconnected) you can just slid the drum forward an inch or two and lift it away. I would recommend removing the drum if this is your first time inside a dryer, as it makes it much easier to access all the other parts and it only takes a second to re-install later. Taking it out also means no one has to hold it up while you work
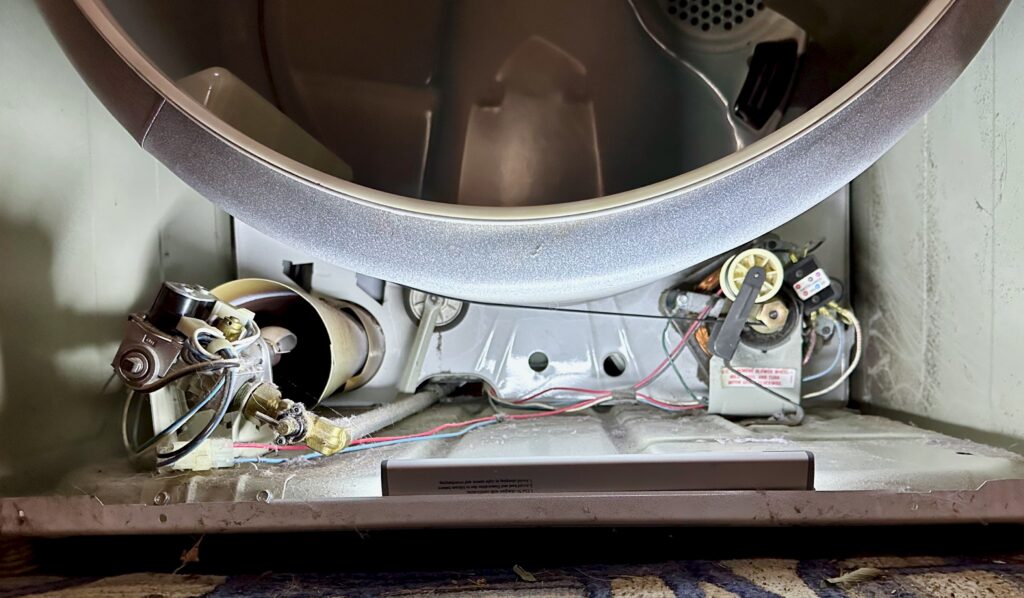
Under the drum there are two main parts — the hot part and the spinny part. The hot part (left on my unit) uses fire or electricity to get hot and the spinny part (right) both runs a fan in the back and turns the drum in the front. The image above shows my dryer after the belt is reconnected. When I first opened it the belt lose around the drum, not connect to the motor or pulley, and the pulley was laying flat against the bottom of the case
If you take the drum out you can also see the little skateboard-like wheels that hold it up off the case (always present at the back of the drum, sometimes also present on the front panel). Those are another common point of failure, so while you’re in here it’s worth checking to see that they are all intact and they spin freely. You can see one of mine peaking out under and behind the drum over by the hot part, a white wheel with a black tire around it
That’s all there is to dyer, other than some tubes to route air and a simple controller (behind the buttons/knobs) that turns the hot/spin parts on and off. It is possible to take the back off as well but you’d usually only do that to get things cleaned out of the air tubes, or to fix broken wiring
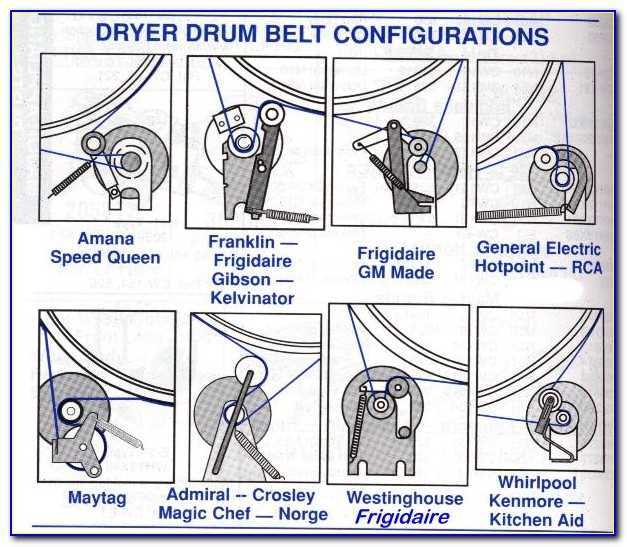
There are slightly different belt paths for different models of dryer but they all work by wrapping a belt around the drum, around the motor shaft, and over a tensioned pulley that keeps the belt tight. Above are some common belt routing paths; mine is the bottom-right drawing, where the tension is provided by the pulley arm bending rather than by a separate spring
Putting it back together is just reversing the steps. If you took the drum out, get it back in and hold it in place. Install the belt around the drum, motor, and pulley. With the front panel tipped forward, get it set into the tabs near the bottom then tip it upright to support the drum. Put the front panel screws back in, reconnect the door switch, flip the top back down so the front corner clips engage, then add the screws back to the lint trap door